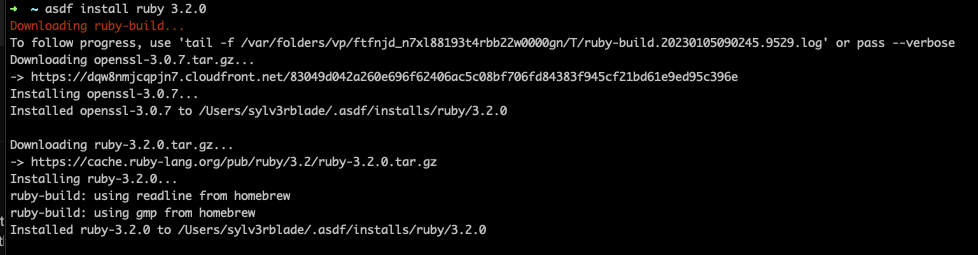
Like clockwork, ruby 3.2.0 has been released on December 25 and given that our build tools now support it, it’s time to start trialing if our projects will be able to run on it without issue.
I’m using asdf to manage my node and ruby versions – switched them from rbenv and nvm respectively to make things a bit simpler. Here’s what happened when I tried to install ruby 3.2.0 even after making sure asdf and the ruby plugin are updated.
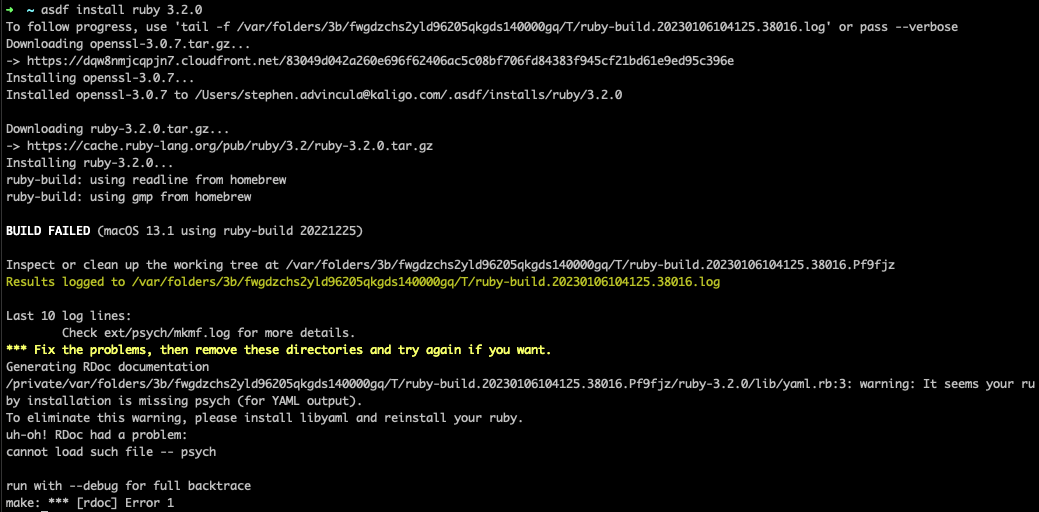
That’s not good obviously.
From reading the snippet of the build error, we see two things it seems to be reinstalling openssl and is having trouble finding libyaml – both errors shouldn’t occur since my system already them installed via homebrew.
Thankfully, the fix for this is simple. We just need to make sure to point to existing libraries.
The lib that compiles ruby for us, ruby-build has a way to provide options for it’s builds, via RUBY_CONFIGURE_OPTS. In my case all I needed to do is run this:
export RUBY_CONFIGURE_OPTS="--with-zlib-dir=$(brew --prefix zlib) --with-openssl-dir=$(brew --prefix [email protected]) --with-readline-dir=$(brew --prefix readline) --with-libyaml-dir=$(brew --prefix libyaml)"After adding the ruby config opts, we’re now able to finally install ruby 3.2.0!